In a search for a block that is totally comprised of triangles, I stopped on the Double Z Block in the Brackman catalog Encyclopedia of Quilt Patterns (3225). Now, there’s at least three historical blocks called “Double Z”, and all the online tutorials I’ve found are for the version that is more balanced in four quadrants. But that’s not what I want, I want this:

See how the outside triangles are elongated? When made with light and dark values, or two colors, it has a really interesting 3D effect. So we need to crack the code.
I broke it down into three elements. At the center, an hourglass block. Above and below the center, a triangle in a square block, and mirroring each other on each side, we’ll call them leaning triangle blocks, right and left. Making an hourglass block is very basic quilting element. You can easily find tutorials online and I would direct you to any of those if you need a reference to make that unit.. You can also find tutorials for the triangle in a square, but I’m going to walk you through making your own paper piecing template for that one and for the leaning triangle.
Stay with me. If you have paper pieced before from a printed pattern before you can do this too. It’s very easy.
These pictures and instructions are for the 12″ finished block. Later on I’ll give dimensions for other sizes.
STEP 1: Choose your fabrics. At minimum you’ll need a foreground and a background. You could also play with values by making the Leaning Triangles lighter or darker than the other units.
STEP 2: Make an hourglass block measuring 4.5″, so when it’s sewn in it will finish at 4″. Most tutorials are a two at a time method so you’ll have an extra. Cut two squares, one foreground and one background at 6″ each to have enough room to trim the block to where you need it to be.
STEP 3: Get a sharp pencil, a quilting ruler, and a blank piece of paper (bonus points for recycling). Draw a nice, crisp 4″ square. Keeping the sharp point of the pencil as close as you can to the ruler edge will help with accuracy. Find the middle of the top line of the square and mark it. Draw a line from this center point down to each bottom corner to make a triangle. Then, draw another one. If you want, you can write the piecing order on the drawing. Inside the triangle will be 1, then the sides will be 2 and 3. Don’t worry about seam allowances at this point. Also, don’t mind my lines that are overshot in the drawing below, it just helps me find a sharp corner.

Good? Ok. Two more drawings (if you have a copier at home)
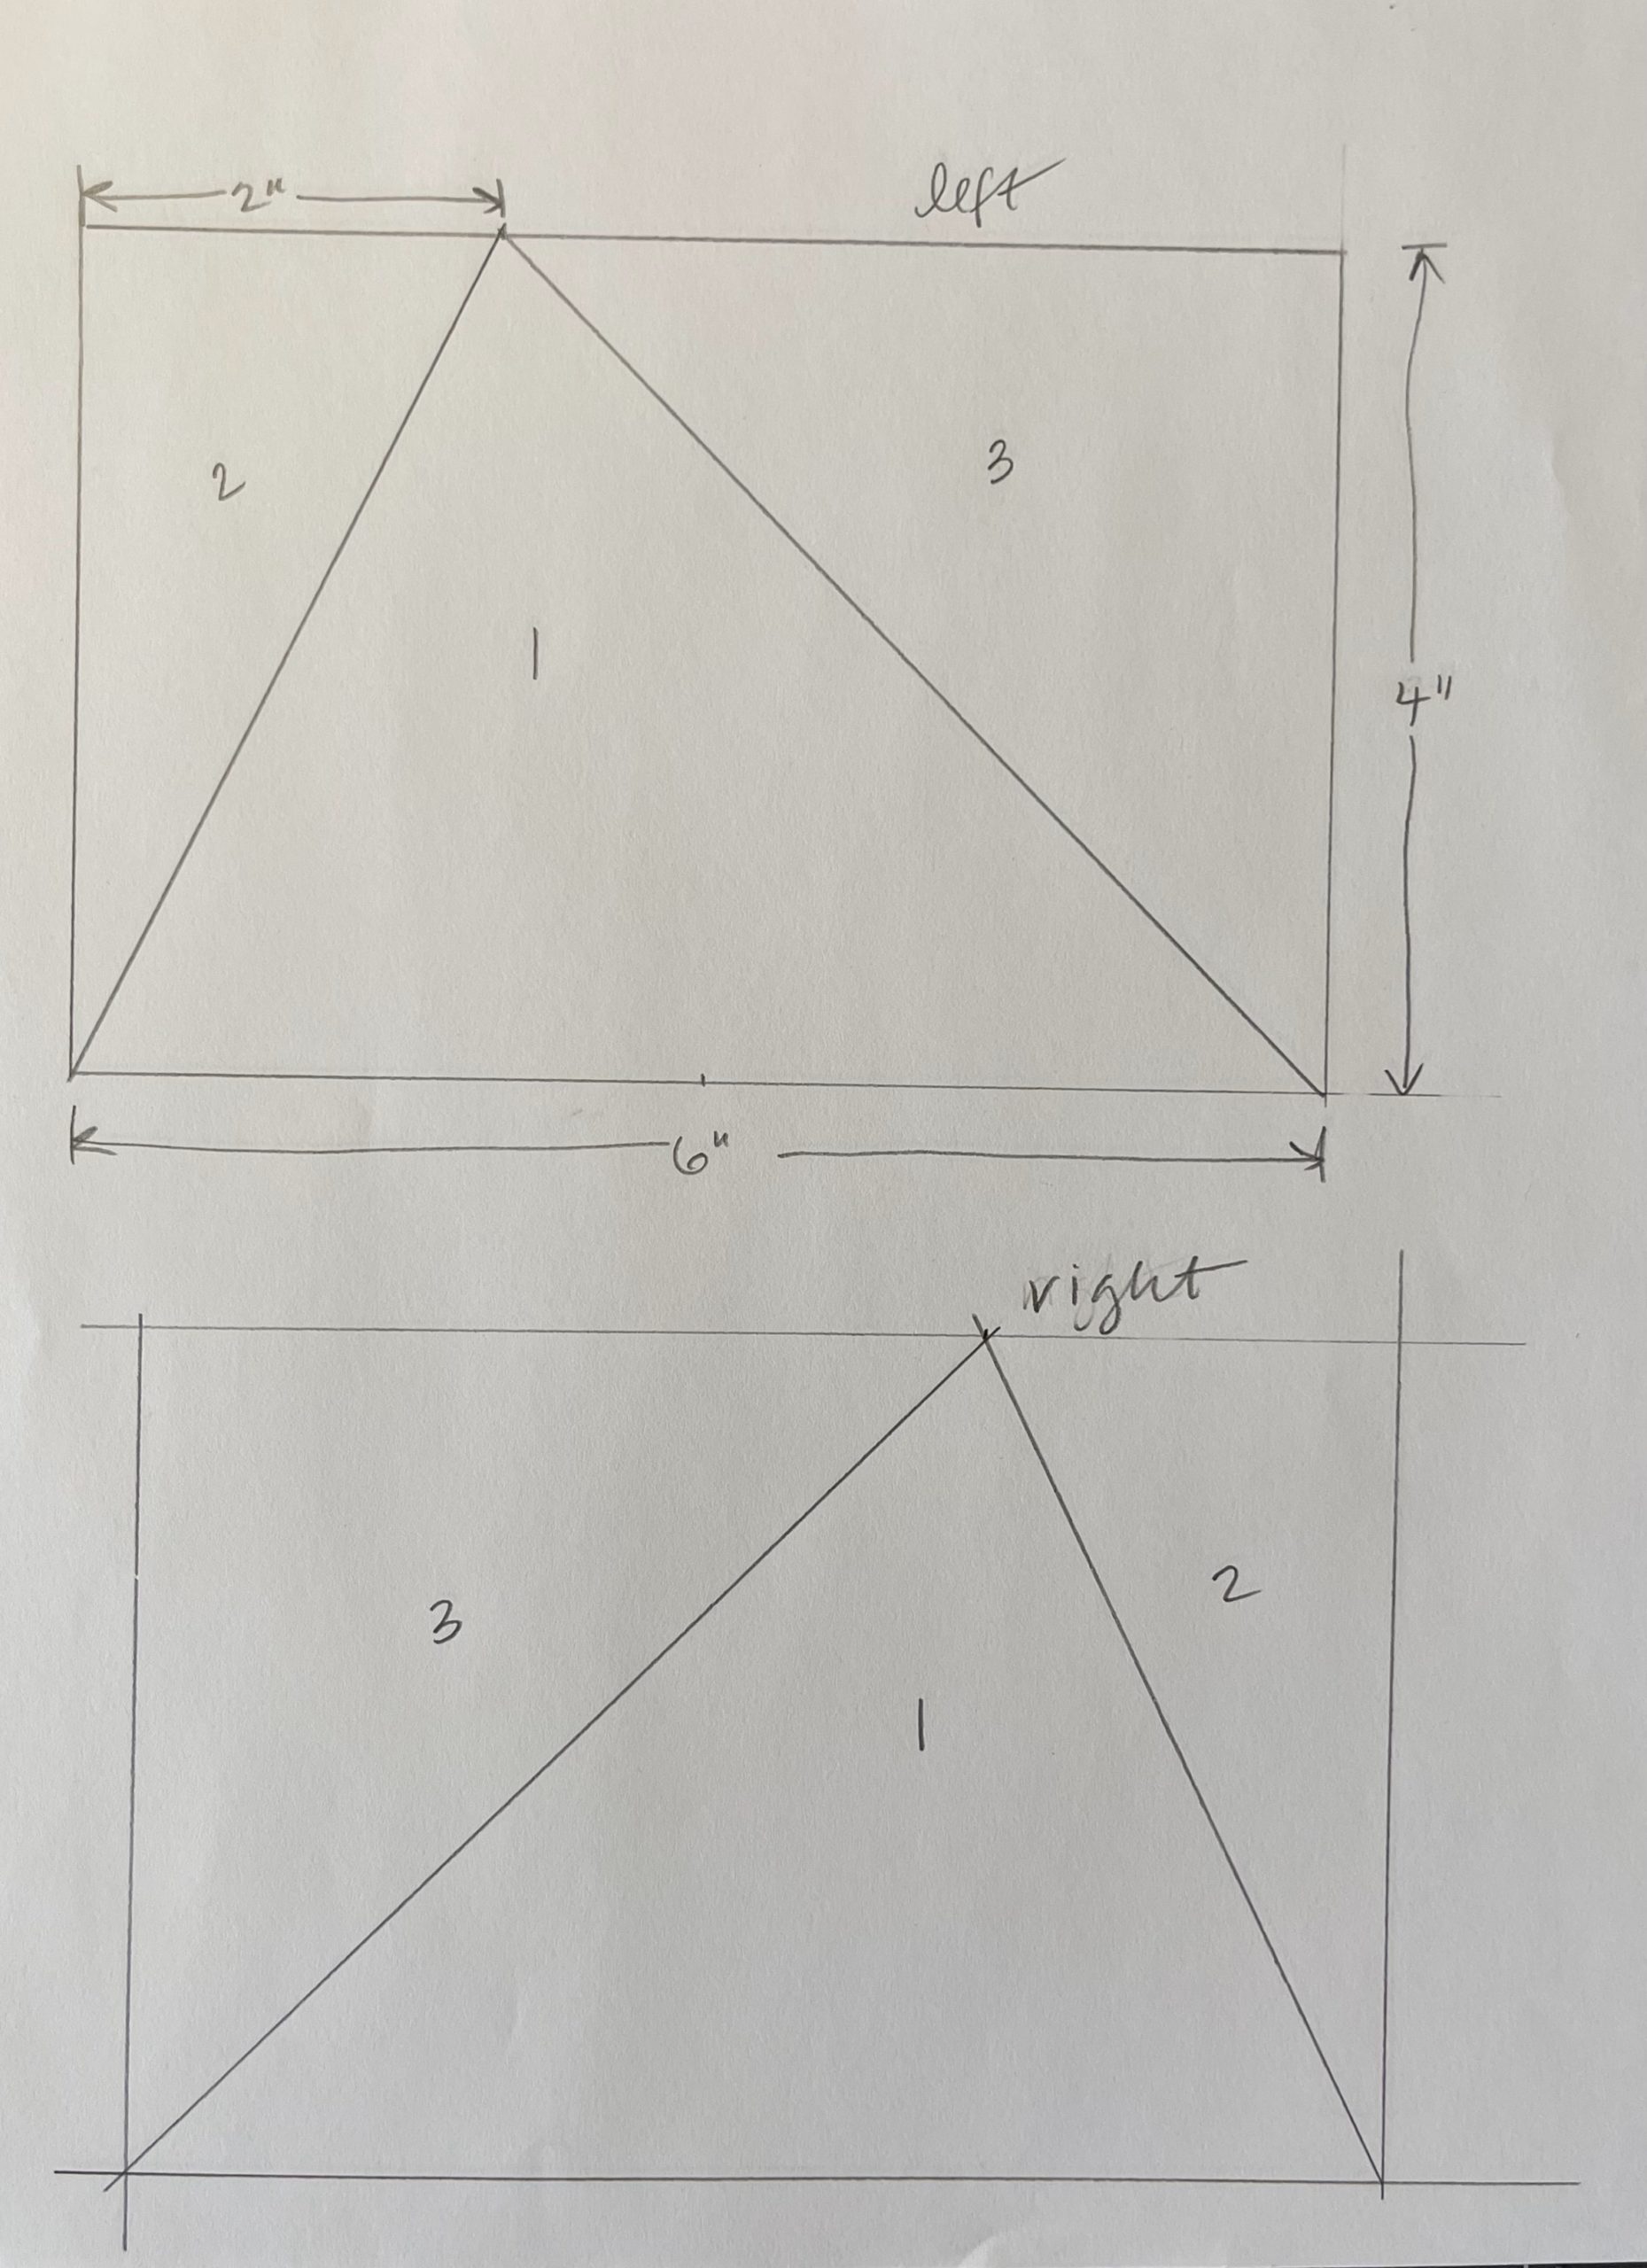
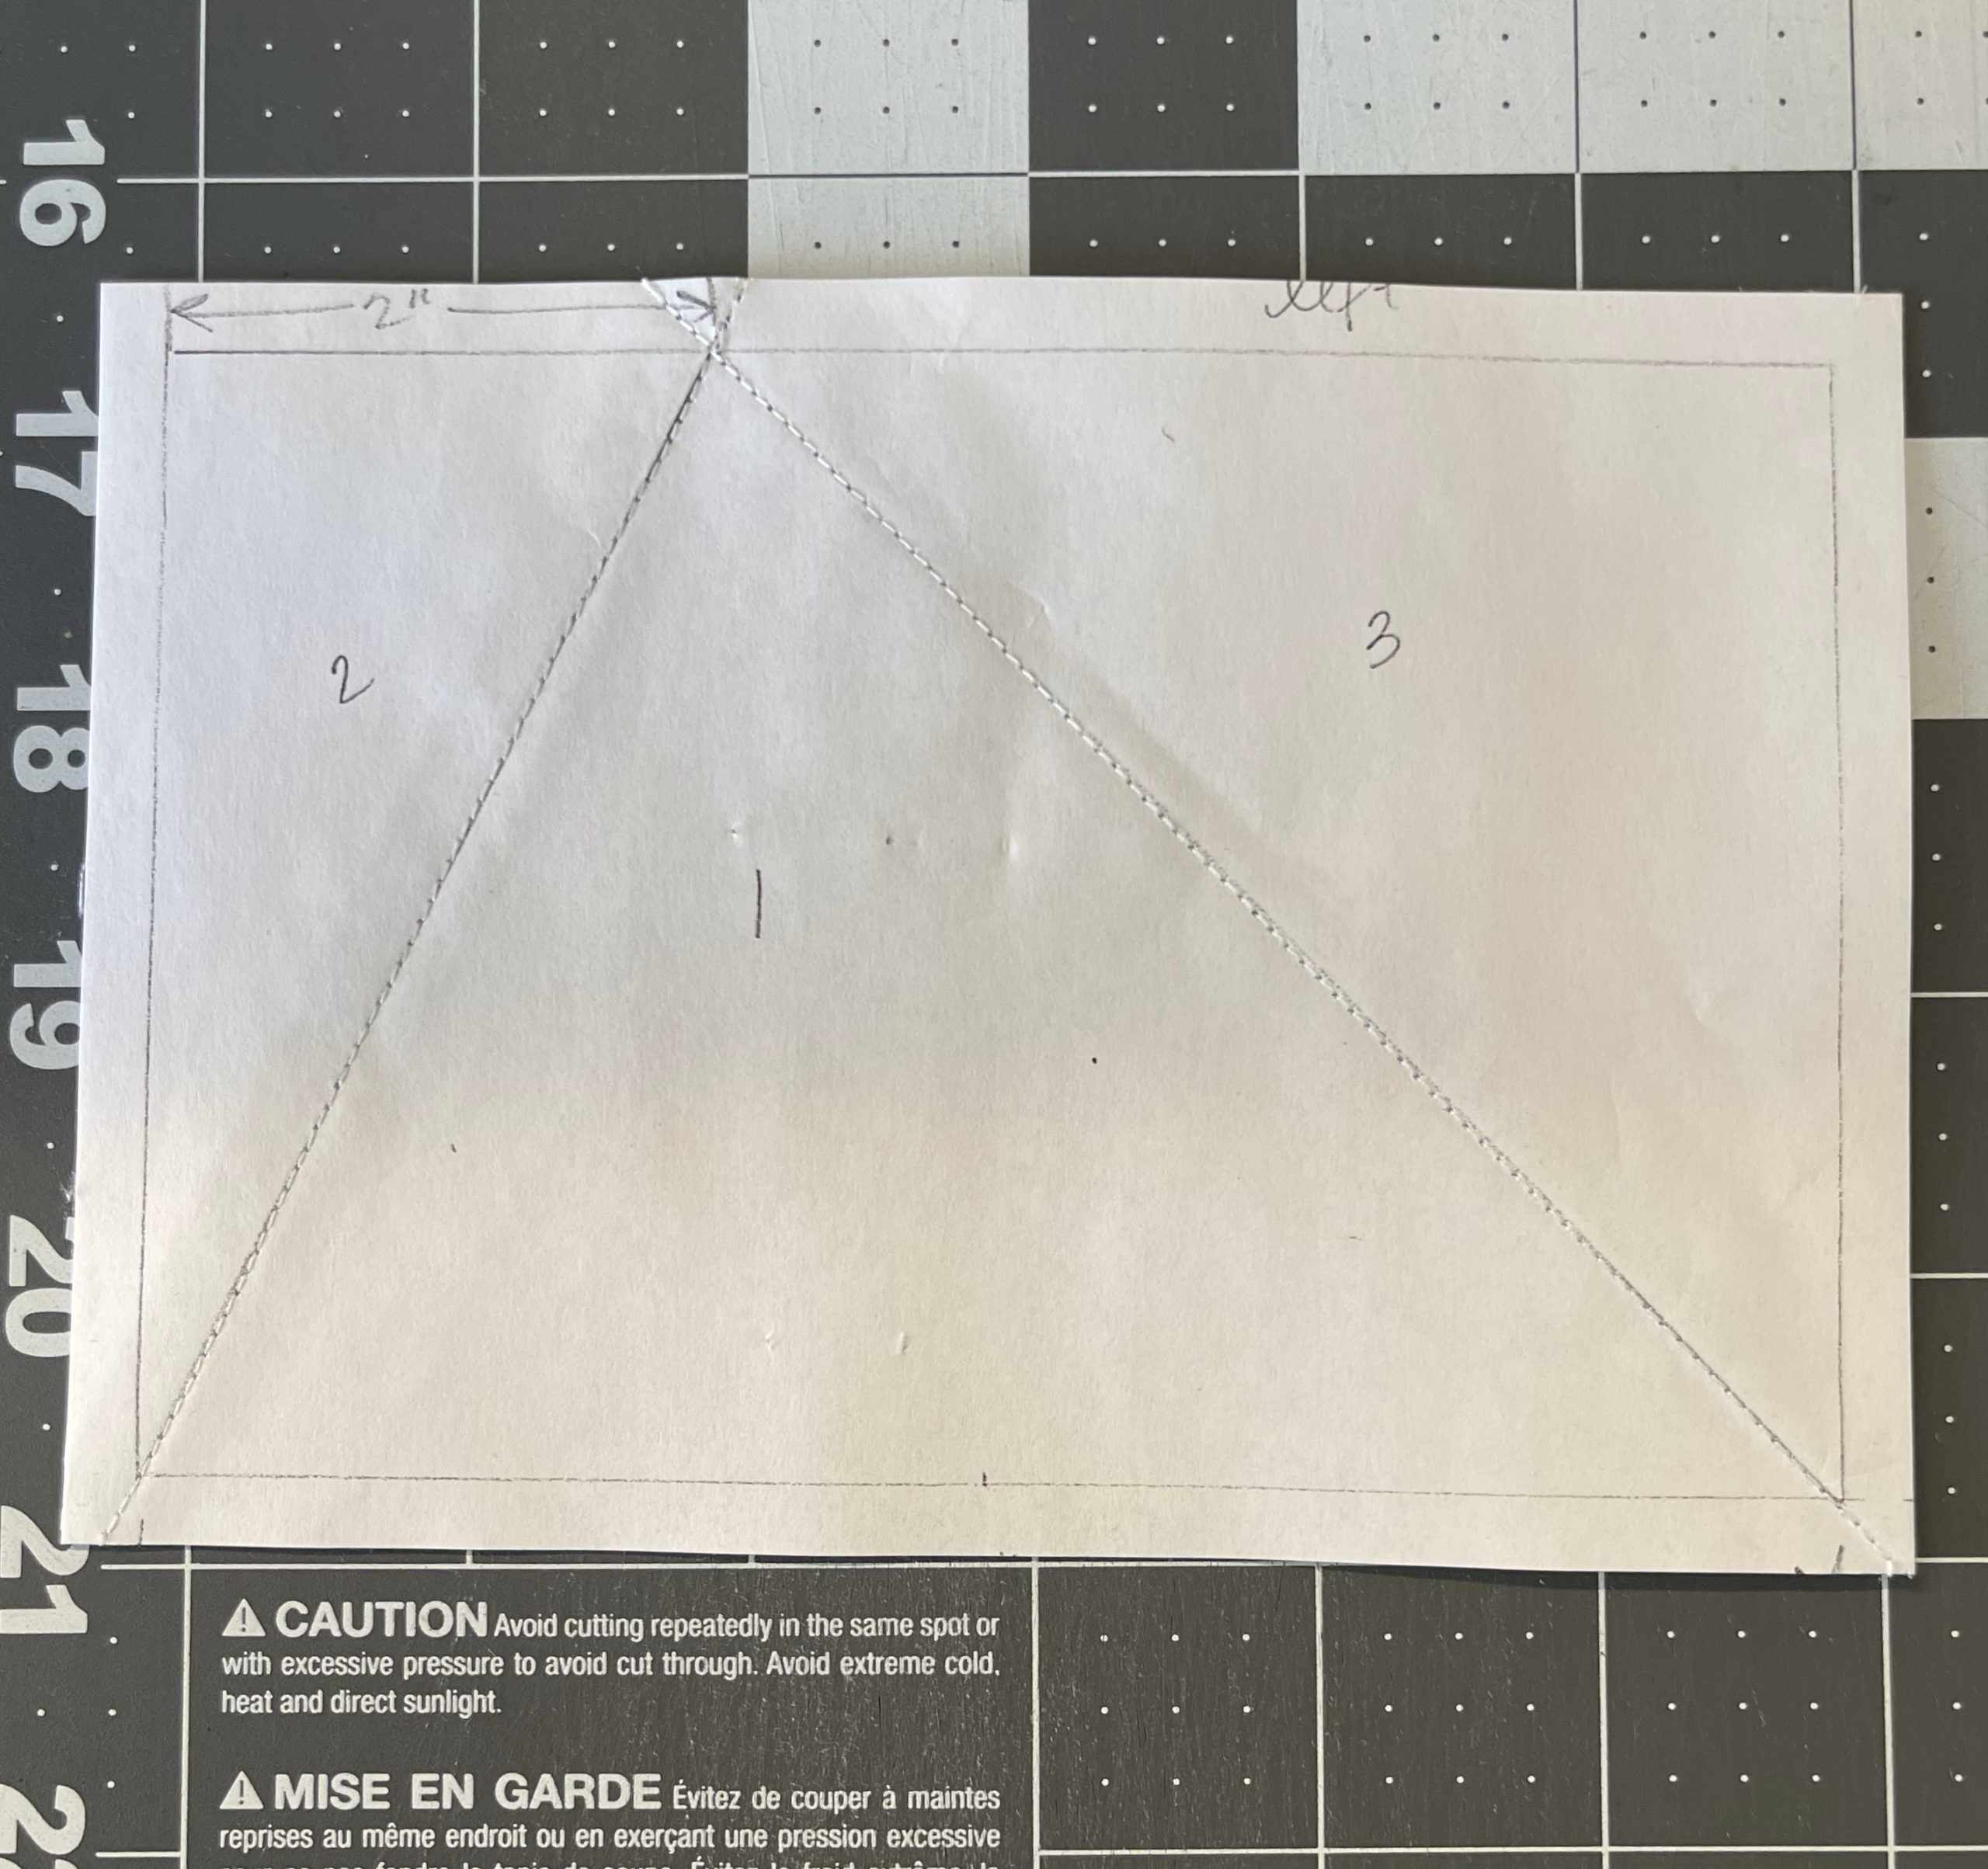
STEP 4: Draw a rectangle, 4×6″. Mark 2″ in from the left side on the top line. Make your leaning triangle from this point. Repeat for the other side, mirroring at 2″ in from the right side. Add your piecing order numbers if it helps. It’s probably more useful to label foreground/background colors. Make a copy so you have two rights and two lefts to sew on. Remember, what looks left on the paper will turn out to be a right on the finished block. Don’t get too hung up on this. It’ll work out as long as you have two sets of mirrored blocks.
STEP 5: Paper piece those patterns. If you intend to amke more that one finished block, I’ll suggest making copies of your drawn squares now. When you get ready to trim the outside, that’s when you trim at an extra 1/4″ seam allowance on each side, like this:
Congrats. The hardest part is done.
STEP 6: Tear off papers and assemble. Below is the layout. Do you see how the triangle corners that aren’t 45 degrees don’t point into the corner exactly? That’s good. That’s how it should be, it’s your angle extended into the seam allowance.


STEP 7: Admire. If you’ve never made your own paper piecing pattern before, congratulate yourself. You have unlocked a new skill.

If you want to make other sized blocks, here are the cutting dimensions:

If you enjoyed making this, I’d love to know. @s.j.lauzon on IG